Showing posts with label donor prep. Show all posts

Saturday, July 25, 2009

Power Supply


Here's a little project that I've been meaning to get to since before the big move to the new house - building a benchtop power supply out of spare computer parts. Why build a power supply? Good question - lots of answers:
  • The only motorcycle battery I currently have is in my running Kawasaki Vulcan. I don't really want to spend time disconnecting the battery from that bike just for bench testing (there is no way that I would test stuff while hooked up to my bike).
  • I would rather not have to fool with recharging a battery just for testing
  • I've been itching to solder something and do an electronics project.
  • If I really mess something up, the power supply is smart enough to shut down rather than fry itself. If I cross the leads on a battery, ouch (I've heard that it's like crossing the streams).
  • This power supply also outputs +5v and -12v. I'm sure that will be handy for an electronics project sooner or later.
Credits
Behind every great project (and even mediocre ones like this) is usually list of semi-willing contributors:
  • Chris H for providing phone support while in Radio Shlock picking up parts (the power resistor worked like a champ).
  • Tim M for providing the donor power supply.
  • Ulysses and Wendy for the gift certificate that bought the heat shrink tubing.
  • Mr Barrowman for letting me play with breadboards in Technology class during the formative years.
Resources
Turning an ATX power supply into a benchtop power supply has been done many times by people who take much better pictures than I would, so here is what I used (there are many available online, but this is what I stumbled on):
  • This was a nice simple post on to build the unit. It even had some notes for making a more simple setup (no switches, LEDs, etc).
  • Instructables via Make - This was an okay set of instructions, except for a few key issues (the plan was more complicated than I wanted - I just wanted to plug it in - no switch necessary). More importantly, the plan called for a fused ground (readers tore the author a new one for that in the comments). That's not a safe / cool way to fuse a circuit, so I didn't do that.
Things I Learned
I always learn something from these projects.
  • I really need a better soldering iron. I still have my old nasty 30W pencil from Radio Shack. Specifically, I need something that I can rank up the heat on for soldering larger gauge wires. Make has had a lot of articles about just this sort of thing lately.
  • I need a better soldering station. I'm using an old sponge for cleaning and a screwdriver rack to hold my iron. It's neither safe or efficient.
  • Heat Shrink tubing is just cool as hell. It really makes a project look nice and neat. I think that it's a bit more robust than electric tape as well.
  • I should have drawn the circuit before I started. It was a dirty simple setup, but drawing it out would have saved some unbundling of "unused" wires. My workbench is a whiteboard, so there's no excuse there.
  • I should have saved the rest of the computer that I pulled the power supply from. It had handy things like LEDs that would have made the project look a little more nifty. Although it should be noted that it's pretty obvious when the power supply is on because the fan is louder than hell.
  • Wearing eye protection while drilling isn't as dumb as it sounds. My drill bit caught and spun the power supply around while the wires whipped around and broke one of my favorite Coke glasses. Darnit.
It looks like the "cool" way to build the unit is to stick the fan on the outside of the power chassis. I didn't really need any extra room on the inside, so I just left it where it was (the wires for the fan were pretty short anyway so this was the lazy option).

Now I can get to work on getting some of the basic electronics kicking on the bike (signals, brake lights, etc).

Friday, July 10, 2009

Two brakes are better than one


This has been a productive week. I just finished getting the front brake all hooked up and working. I was really surprised - everything worked on the first try! I was tempted to skip the teflon tape when I was connecting the brake line, but thought better of it.

All I did was run a bunch of fluid through the system to flush it out and it's good to go! Tonight's run around the cul-de-sac was smooth and uneventful considering I had two working brakes (front and rear). Yay!

I would have had the speedometer cable hooked up, but unfortunately I can't find that cable. I can find every other cable (Tach cable, clutch cable, throttle cables) except that one. I'm hoping that it's just hiding in one of my totes or something like that. If not, I'm hoping it won't be too hard to find a replacement.

I'm getting to the point where I really need to find some actual EV bits - like a motor, controller, batteries, etc. Sweet!

Wednesday, July 8, 2009

Rolling Chassis!


It's back! I was so excited that I took the chassis for a spin around the cul-de-sac. As it turns out, my street is much more downhill then I ever suspected. Fortunately, the back brake (while not fully adjusted) operated enough to prevent another trip to the hospital.

While trying to figure out how to fill the forks with oil, I ran across this little gem from Walmart:


While it looks like something from a slasher flic, it's a "Flavor Injector." It has two stellar properties that I needed:
  • It was accurate enough to measure the amount of oil I need to inject
  • The needle part allowed me to inject the oil down in the fork itself instead of waiting for it to drain in slowly. I customized the syringe by cutting of the end, but otherwise it performed brilliantly.
Next up is finishing up the front brake. After I took the pic, I went ahead and mounted the front caliper and the brake lever. The pads and the master are in great shape, but some of the bits in-between might need some love. The bits are around 35 years old, so it's a wonder any of it works at all.

Tuesday, July 7, 2009

The Rear is in Gear


Well, it's not really in gear per se, but the back tire is on! And you were probably thinking that because it took me eons to get the rear brake apart that it would take me forever to get it back together. Well you were wrong!

The drawback of it taking so long to get the bike back together is that I had to do a lot of referring to the manual to make sure I was getting everything back in the right place. Fortunately, I only had to put the sprocket on twice. Also, I'm not putting the cotter pins or torquing anything down until it's all together and lined up correctly. In particular, it looks like getting the rear brake pedal adjusted is going to take a bit of fiddling. The good news, however, is that it (the brake) seems to work fine even after my taking it apart and cleaning it up.

The next step is to get the front forks back together and get the front wheel back on. Then it will be looking like a proper motorcycle again!

Thursday, July 2, 2009

Victory is mine!


Yay! I finally got the rear drum brake assembly separated from the axle! A while back, I was a bit flummoxed on how to remove it. It wasn't textbook, but a monkey wrench, some cursing and a whole lot of PB blaster eventually delivered victory.

I'm stoked - now I can start putting everything back together and get back to a rolling chassis.

Sunday, February 22, 2009

Too cold for paintwork, turning to woodwork.

It has turned cold again, so no more painting for a little while. I couldn't stay out of the garage though, so I did make a little progress. I added the original speedometer back (not a big deal, two bolts). It is mechanical and runs off of the front wheel, so I'll just re-use it as is.


One problem that I've had with my fancy shmancy motorycle lift is my old small bike frame doesn't fit well on the jack. I've heard that you can buy different adapters for your life, but that just seemed like a good way to spend money without getting what I wanted. I had some lumber left over from a previous project so I used that to make some platforms for the frame. It only took a few minutes, but now I can securely lash the frame to the jack and not worry about it coming loose.

Forunately, I had previously picked up two extra long bungy cords that I figured I could use someday. Well, today is that day. Those cords are perfect for lashing down the frame.

I'm still working on my nemesis, the rear axle. That involves spraying some PB Blaster, beating the snot out of it, cursing, then leaving it to soak longer. I might have to bring it out in the sun on a warmer day to see if I can expand the sleeve a bit before the axle warms up.

Some other fiddly bits I've been playing with are the rear foot pegs. Nothing complicated there, but I stripped them apart and prepped them for paint. It was so cold that the rubbing alcohol I was using to clean them off wouldn't evaporate. Dejected, that's when I decided to make the blocks for the motorcycle lift.

Sunday, February 15, 2009

Nemesis

With every project, there is at least one part that causes more headache than the entire rest of the project. For me, that's the rear axle. Holy crap. The rest of the bike was in remarkable shape when I took it apart. The rear axle however has rusted to something inside of the brake assembly.


My first victory was getting the rear brake assembly to come apart. However, the axle is still stuck. I have put about a gallon of PB Blaster on it and have whacked the absolute crap out of it but still it remains. When the day arrives that I can finally remove the axle, I will wield the shaft like Excalibur itself.

Child Labor

I had some extra help in the shop. Having some extra hands to degrease nasty parts is really nice. The two girls were kind enough to clean up the rear fender for me. They did a great job!


They kept on asking for things to put together, so we ended up getting the bike a little closer to a rolling chassis:


It's starting to look like a bike!

Friday, February 13, 2009

Well Hung Frame

Last night, motivation struck and I made some serious progress on the bike. First, I took apart and cleaned both of my forks. It turned out to be not nearly as scary as I thought it would to break those down. I didn't take any pics of that process, but I did get to painting the frame - finally!

I did as much prep work as my patience would allow. That consisted using my faithful dremel tool (well, I have a cheap Harbor Freight knockoff) to take down the little spots of rust. I then roughed up the paint with some sandpaper. After that I blew the whole bike off with all compressed air. Finally, I wiped it down with rubbing alcohol.

Here is the bike before priming:


Here it is with the primer. I was able to do the whole bike with a can of primer, with plenty of primer left over. This is another good reason to convert a bike - there isn't as much surface area to work with when you compare it to a car.


Here is a shot of my professional hanging apparatus. These are some chains I found in my bins (they came from various hanging lighting fixtures and other projects). And yes, I'm just hanging it off my of garage door opener frame. It's conveniently located in the middle of the garage, so it works well. Note the little piece hanging from the chain on the right. That's the little piece that holds the gauges.


I actually got the first coat of black paint on last night. I'll take some pictures after my second coat tonight.


Tuesday, January 6, 2009

What the Fork?

Ok, so I thought I was going to work on the frame next. Well, I was trying to order some parts to rebuild the forks with, but unfortunately the guys at Honda weren't entirely sure which parts I would need. They recommended that I break down the forks to see what they had. The old exploded images of parts aren't entirely clear, so they wanted to be sure they were getting me the right stuff.

I felt inspired last night, so I went to work on the forks for the bike. Well, one of the forks anyway. What I've found out so far is that it takes longer to degrease / clean up what I'm working on that it does to actually do what I set out to do.

For example, I had hoped to take both forks apart so that I knew exactly what to order. Well, I didn't get either fork apart. I spent the whole evening just cleaning up one fork.

Here's what I started with:


And here is what I ended up with after much scrubbing, brushing, power drill work, etc:


It's not factory or anything, but it looks a lot better than it did when I started. The hardest part was getting the nasty inspection sticker off. It had been on there since 05. Underneath the inspection sticker were all sorts of dings from years of abuse. When I get this on the road, I'll add one of those cool flaps of metal to put the stickers on.

I did manage to drain the remaining fork oil out (there wasn't much left). I'll get to use my handy-dandy ring-clip pliers to take these bad boys apart.

Friday, December 19, 2008

Next up - the frame

The frame is in decent shape, but it needs some prep before I pain it. There are a few small rust spots. It also looks like someone might have sprayed this before.

In a perfect world, I would sandblast the entire frame and prime / paint bare metal. Well, I don't have a sandblaster handy. If I did have one, I would probably put together one like my grandfather did. It's pretty clever..

He took an old diesel tank and put a door on the end and a window in the front. How cool is that. Here's a pic I snapped with my phone while on a recent visit:


I did a lot of work in this shop as a kid. It's where I helped rebuild the truck my sister wrecked. It's also where I (with a lot of help from my grandfather) brought one of my favorite vehicles of all time, a 1985 Chevy S-10 Blazer that we found in a junkyard. It was my first 4WD ride and I still miss it.

I think that when I paint the frame, I'll try to set up a makeshift spray tent. I think that I can get away with some plastic sheets and a fan. Anything is better than getting overspray on everything.

Tuesday, December 16, 2008

Getting the frame cleaned up

Last night I got some work done on the swingarm. When I started, it was covered in years worth of chain lube and dirt. Just to get the swingarm cleaned took a few hours of scrubbing with degreaser. After the degreasing, I went to town with my wirebrush mounted in my drill. That worked pretty well for the swingarm, but didn't go nearly fast enough for the shock mounting brackets, so I broke out the grinder with sand disc attachment. I had to be very careful as that disc tore through the metal pretty quick.

Here is the swingarm prepped for pain in my state of the art painting facility:


And here it is after painting. Notice the use of my high volume, low pressure ventilation system (garage door opened). It's critical when using high end paints (such as Krylon) to have proper ventilation. You can also see one of the shock brackets hanging in the upper right hand corner of the picture.


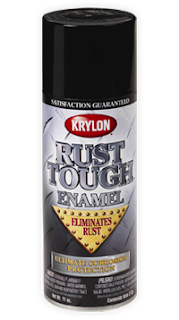
Here is the paint that I'm using for the frame:


I don't know how well it will perform, but it went on easy enough. I highly recommend the purchase of this little guy (I got one at Walmart for between $2-$3). It makes spraying from a can sooo much easier than pressing that little tendonitus inducing button on the top of the can.


Next up is the main frame of the bike.

Thursday, December 11, 2008

Starting work on the donor bike


This pic was taken a few years back on my wedding day. This is back when the bike was running (most of the time). But really, we need to start at the beginning.

This was my first motorcycle, a 1974 Honda CB550. It served the purpose of learning how to ride. It's a solid little bike with some great engineering considering it was built in 1974 (well, I guess it was probably actually built in 1973, but you get the idea.

I rode around on this little bike for a while after getting my motorcycle endorsement, but it wasn't long before I craved something bigger. So, I bought a Honda Shadow 750 Aero - a great little bike. That one was at least big enough for my wife and I to get on.

But back to the 74. My brother in law saw my buddy and I riding our bikes, and he just couldn't help but want to ride. I sold him the old orange beast for half of what I bought it for (and I had dropped a few hundred into it to get it going). After dropping it a few times, he went and became a baby daddy and lost interest in the bike. So, the bike came back to me. What to do? I already had a bike that I liked.

Well, fate intervened and I broke my ankle (long story - it involves a lawn mower). As part of my getting back on my feet, I had rebuilt the lawn mower that had caused me so much pain (a compound fracture and two severed ligaments, not to mention the two surgeries).

Rebuilding the mower was some fun... I got to play around with a welder and other bits. After doing this I really couldn't ride the mower yet as I couldn't walk yet. Also, I wasn't quite ready to jump up on that particular horse again right away (I do use the mower all the time now, though. In fact, I used it to haul the bike parts out of the basement this very evening).

The ol' bike wasn't running too well at that point, so I thought that I could take it apart and rebuild better, stronger. Well, I was half right. I took it apart over the course of a few days. My buddy helped me take out the engine (remember, broken ankle).

After I had taken the engine apart, it soon became apparent that I was in a little bit over my head. I've done all sorts of work on cars over the years (brakes, shocks, other odds and ends) but engine overhaul was a little out of my league. So, there the bike sat for some time, mocking me.

Most of the parts eventually ended up in the basement. The pipes and seats (yes, seats - I had shopped around for another seat) were in the attic. There it sat for a while just rotting away. I even had a brand new back tire for the thing.

Well, the gas crunch hit. Holy crap. At that point, I started thinking about building an EV. I'm working from home now, so I have more time to do the things that I'm interested in (yay!). Well, building an EV is a pretty big project and I have my heart on doing a Jeep Wrangler / CJ. I don't really have the budget for that right now, so I was bummed very a bit.

After installing a new bathroom faucet which required many trips into the basement past my old CB550 bike frame, I realized that I had a great donor bike just sitting there. Over the next few days, I got more and more excited about the project. It was at that time that I also got sick. Doh! Not fair. I haven't been sick for a really long time so this was particularly annoying.

Well, I'm over the sickness (for the most part) so I've been at work. This evening, I cleaned out a bunch of crap that was in my way in the garage and brought the bike pieces out of mothballs (we actually have mothballs in the basement - it totally smells). This evening I didn't get too far, but I finally moved the old motor off the workbench and started cleaning up the frame. It took gobs of degreaser to clean up the rear of the frame and the swingarm, both those are coming along nicely. There are some little bits of rust on the frame, so I started brushing those out. I'm going to pick up some frame paint tomorrow. I'll probably need some more ship towels while I'm there as I went through a boatload this evening.

The frame is in pretty good shape so it was tempting to just starting bolting things back together to get back to a rolling chassis, but I want to do it right and fix everything up as I go. I figure a couple of nights spent doing it right will pay off in the end.

After I get the frame back together, I will need to rebuild my forks. They're in terrible shape. I'll have to get some new seals / fork oil for those guys. I haven't rebuilt forks before, so I hope it's not too much of a pain. I do have the shop manual for the bike, so at least I've got some direction / pictures to go by.

As part of the funding process, I'll be selling off the bits I don't need anymore (carb rebuild kits, the carbs themselves, the top-end gasket set etc). I'm going to hold onto the motor for a bit because it might have some handy pieces. I've already taken off the sprocket, but maybe I can use some other things. We'll see.

I'll snap some pics before I start work on it next time.